
Chocolate is the Answer

I thought about starting a blog for quite some time. Years, probably. I’m finally at a point in my life when it seems to make sense. So, I have started one, and here we are. Me writing, you reading.
But I have to tell you something about that writing part.
It’s hard.
(Cue writers’ collective reaction: BIGGEST UNDERSTATEMENT POSSIBLE).
I can talk about food for hours on end. Ask my mother.
Why does it feel different to try to WRITE about food for hours on end? Why do I fear that I, a person who has never run out of things to say, will actually run out of things to say about food?
As I started to consider more seriously the possibility of starting a blog this year, I attended a fantastic writer’s conference. I walked away with a pocketful of gems like:
“The first thing to do [about writing] is stop not doing it.” -Anne Lamott
“You are the hero. No one can do this for you. The grownup is not coming. You are it.” - Sarah Bessey
Got it. I AM THE GROWNUP. If I want to do this, I must simply do it.
Gulp. I must actually do it.
This is why the kitchen is helpful to me. It’s a place of action.
The kitchen moves me from contemplation and consideration and all the other delay tactics that go on in my head into DOING. I get out the ingredients. I haul out the mixer, the measuring cups and spoons. I measure. I stir, scoop, roll, knead, cut, fry, bake, glaze, frost, sprinkle. I wash innumerable dishes and re-impose order in my kitchen.
The act of physically crafting something gives me the freedom, the confidence, the space to engage in the process of mentally crafting something.
During the writer’s conference, Sarah Bessey also said, “Creativity comes from something, not nothing.”
This week, my something was making Double Dunked Chocolate Donuts.
The writing part can be hard. The eating part never is.
Also, chocolate is always the answer.
Well, maybe just for me. It’s certainly not for my husband, who eats no chocolate whatsoever.
(I know. I KNOW. He’s really a great person. Really.)
And maybe the helpfulness of the kitchen is something unique to me too. Perhaps it’s not the act of physically crafting something that helps you in your process of mental crafting.
Maybe it’s a hard run. Getting lost in a book. A long talk with a good friend.
Or, as my dear husband says, maybe it’s “writing down crap until something good comes of it.”
Whatever works for you.
Although eating some chocolate probably wouldn’t hurt either.

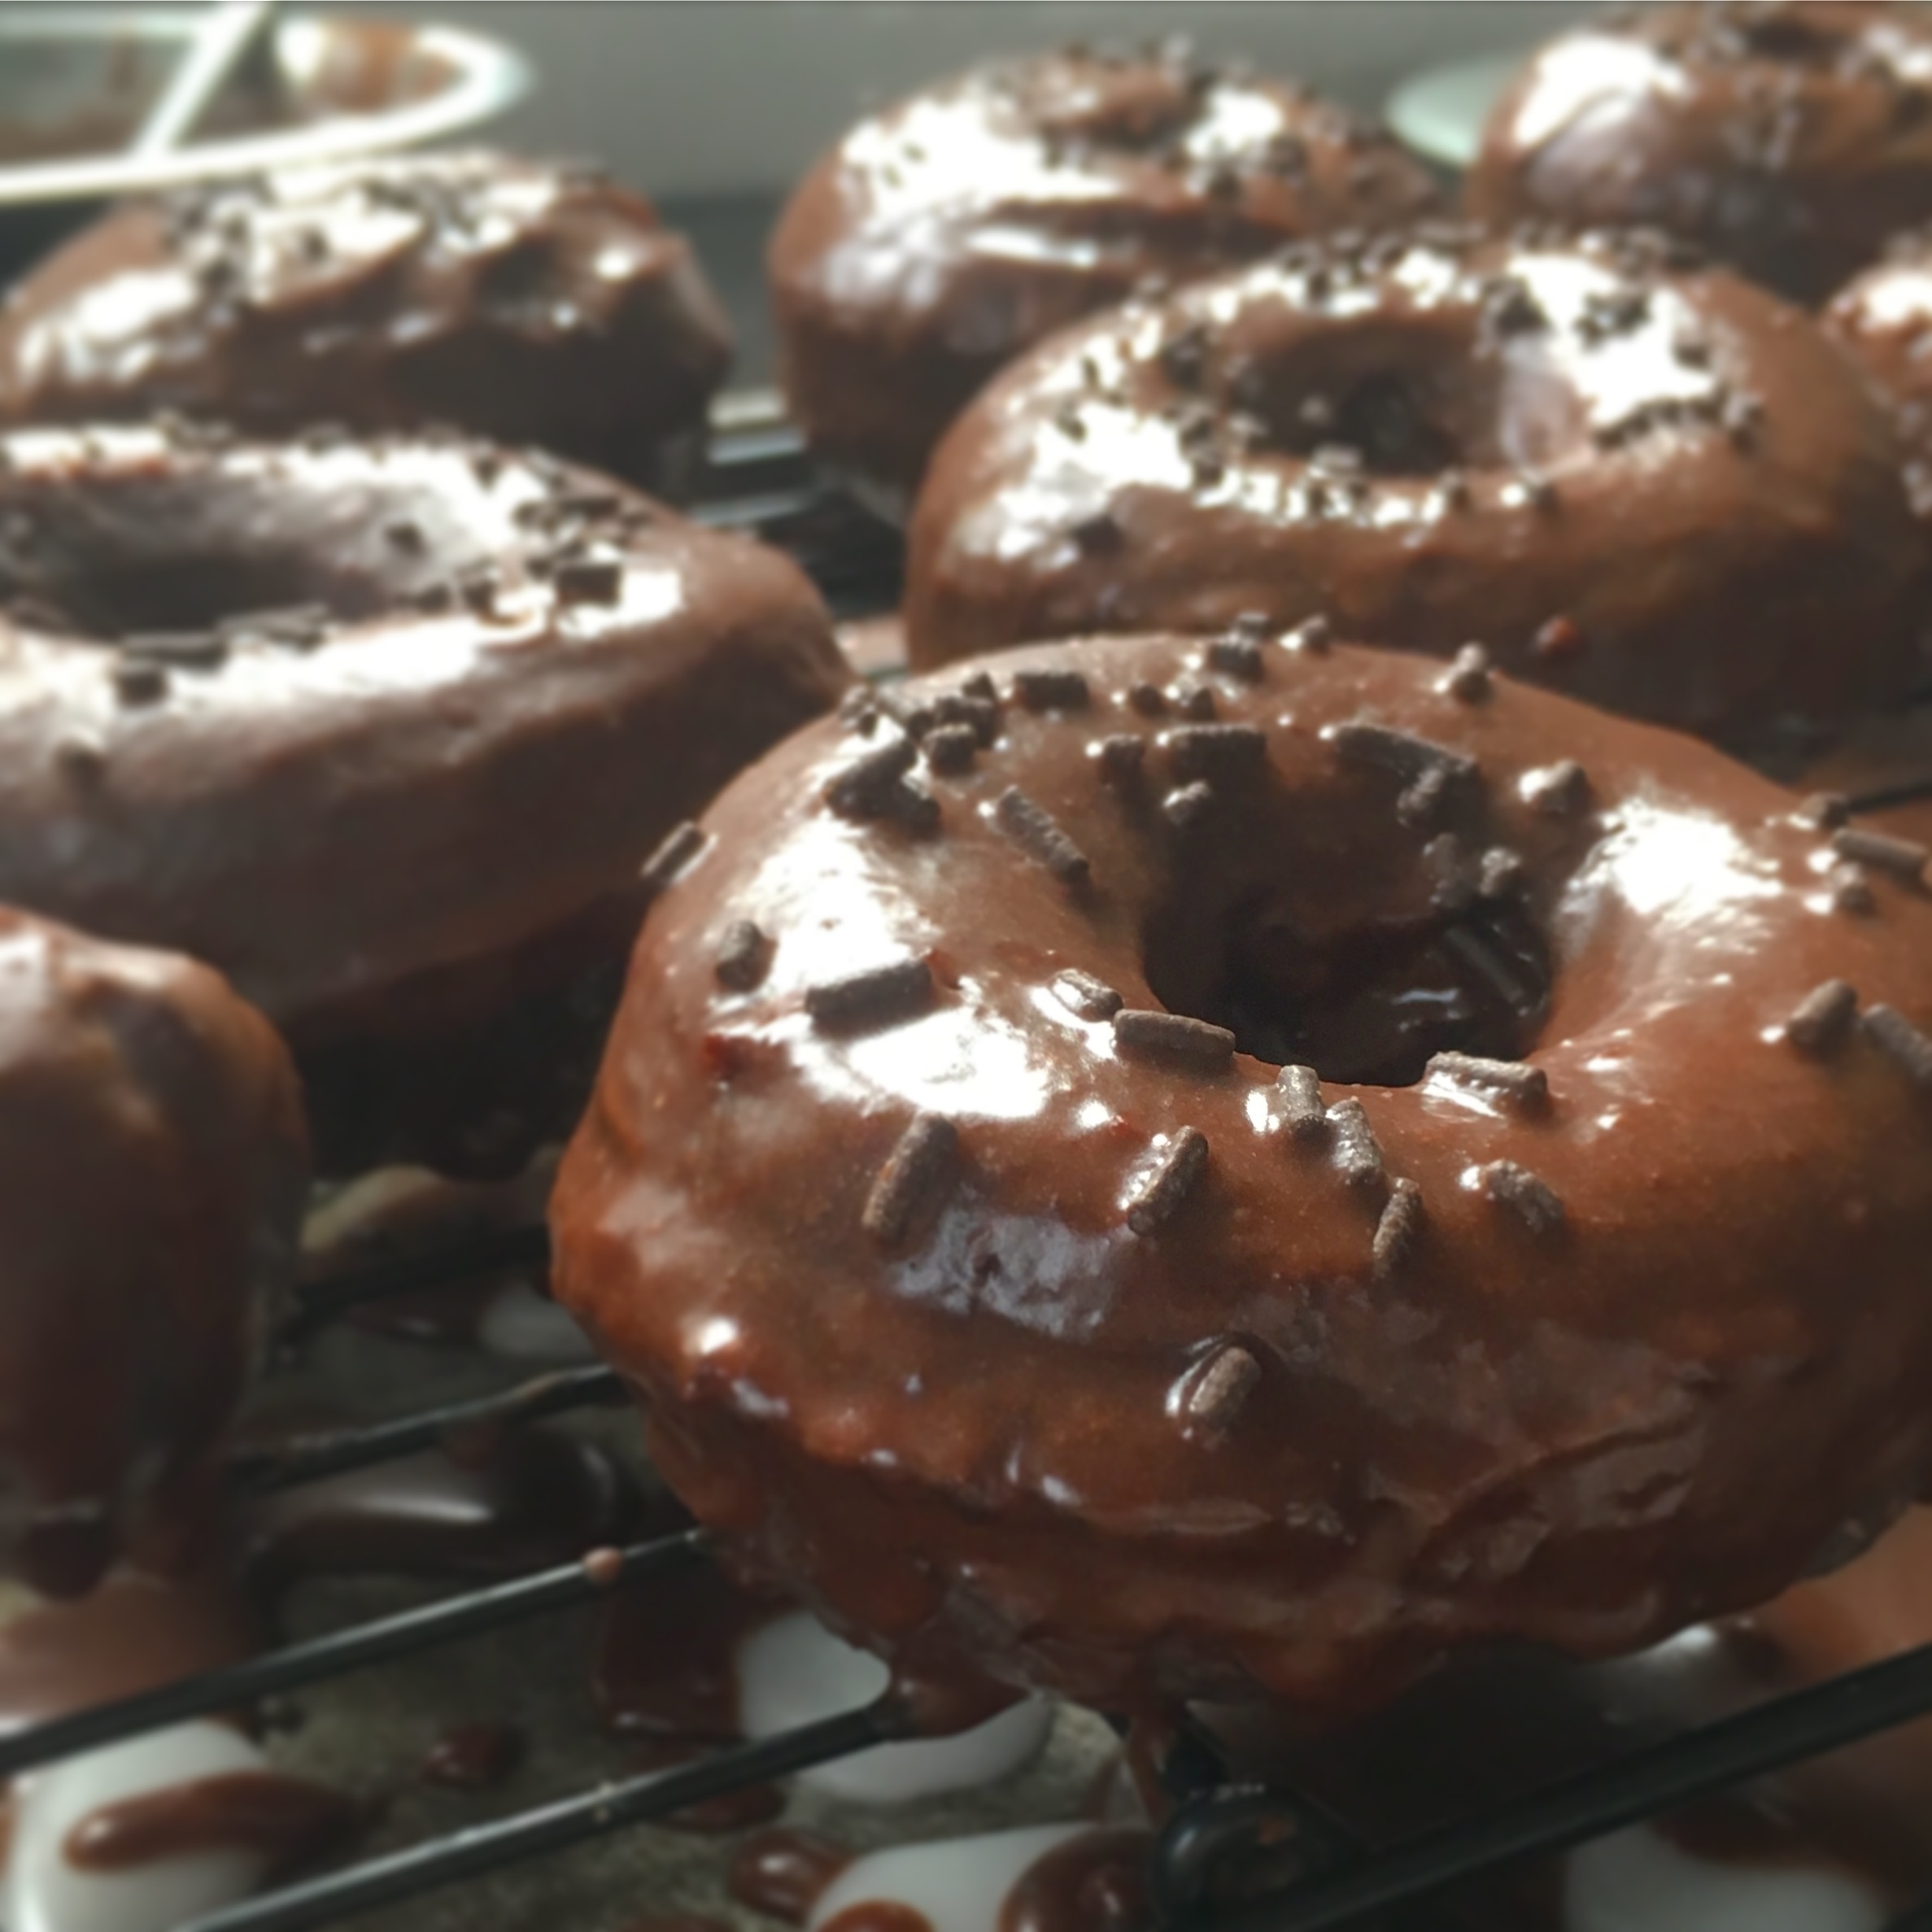
I was at a national chain donut shop over the weekend with my daughter, and she picked the most chocolatey donut there (atta, girl!): a chocolate cake donut, dunked entirely in a glaze, topped with chocolate icing, then strewn with chocolate sprinkles. This donut got stuck in my head, and I knew I had to make it. And make it better. I think I did! It's certainly for chocolate lovers only. One of my testers said, "Full bodied cocoa reaches out and does not let go. Kaboom!" I confess that the plain donuts without the glazes were not quite sweet or moist enough for me. But the double glazes did the trick. When in doubt, add more chocolate! This recipe makes a lot of large donuts, so be prepared to share.
Double Dunked Chocolate Cake Donuts
Adapted from: Devil's Food Donuts (donuts) and Flour: Spectacular Recipes from Boston's Flour Bakery + Cafe (chocolate glaze)
Ingredients:
Dough:
4 ounces bittersweet chocolate, broken into pieces (or bittersweet chocolate chips)
3 tablespoons unsalted butter
1 teaspoon instant espresso
1/2 cup boiling water
3 cups all purpose flour
2/3 cup unsweetened cocoa powder
2 teaspoons baking powder
1/2 teaspoon baking soda
1/2 teaspoon salt
2 large eggs
2 large egg yolks
1/2 cup granulated sugar
1/2 cup sour cream
1-1/2 teaspoons vanilla extract
A lot of vegetable oil (at least 48 ounces, probably more)
Plain Glaze:
3 cups powdered sugar
Up to 1/2 cup water
Chocolate Glaze :
2 ounces bittersweet chocolate, broken into pieces (or bittersweet chocolate chips)
2 cups powdered sugar
6 tablespoons water
Chocolate sprinkles, if desired
Directions:
Make the dough: Place the chocolate and butter in a microwave-safe bowl. Heat for 30 seconds and stir, then continue heating and stirring in 15 second increments until melted. Set aside to cool slightly. Add the instant espresso to the boiling water; set this aside to cool as well (you can also use 1/2 cup cooled strong coffee if you have any leftover from your morning joe).
Sift together the next 5 ingredients (flour through salt) in a large bowl. Don't be tempted to skip the sifting; cocoa powder tends to be very lumpy. Set aside.
Place the eggs, egg yolks, and granulated sugar in the bowl of a stand mixer. Using the paddle attachment, beat together on medium speed until mixture is slightly foamy and lighter in color, about 3 minutes. Add the melted chocolate mixture, sour cream, and vanilla. Beat on medium speed until combined, about 30 seconds, stopping to scrape the sides and bottom of the bowl once.
On low speed, gradually add half the flour mixture to the mixer bowl until incorporated. Scrape the sides and bottom of the bowl, then slowly pour in the cooled coffee on low speed to prevent splattering. Once the coffee is incorporated, gradually add the remaining flour mixture, stopping to scrape once or twice. Mix on low until ingredients are fully combined and dough has the consistency of a very thick, sticky brownie batter.
Place a large piece of parchment paper on the countertop. Scoop the dough out of the bowl onto the parchment, and cover with an additional piece of parchment. Using your hand, gently flatten the dough. Then, use a rolling pin to roll the dough out to 1/2” thickness. Place the dough in parchment in the refrigerator, and let chill for 45 to 60 minutes or until the dough does not stick when parchment is peeled away from it.
Prepare the donut making and glazing stations: Line a baking sheet with paper towels and set next to your stovetop. Dust another rimmed baking sheet with flour and place a few tablespoons of flour in a small bowl next to your donut cutters. For the plain glaze, place powdered sugar in a medium bowl and add 6 tablespoons of water. Stir together until the consistency of thinnish glue, adding the additional 2 tablespoons of water if needed, and set aside. For the chocolate glaze, place the chocolate in a microwave safe bowl, heat for 30 seconds, and stir. Continue heating and stirring in 15 second increments until melted. Set aside to cool for about 5 minutes. Once cooled, place powdered sugar in a medium bowl, and add melted chocolate and water. Whisk together until it is a smooth, pourable consistency, and set aside. It will thicken a bit as it sits; this is what we want! Place a cooling rack on a large rimmed baking sheet (or on top of a piece of parchment or wax paper) on the counter next to your glaze bowls.
Begin heating the oil: About 10 minutes prior to cutting, place at least 2” of vegetable oil in a large, heavy pot outfitted with a candy thermometer. Heat over medium, and keep an eye on it. Once it reaches 350 degrees, you’re ready to fry.
Cut the dough: Meanwhile, when the top piece of parchment can be peeled away from the dough without significant sticking, remove the parchment entirely from the dough, and set aside. Leave remaining dough on bottom piece of parchment and place on counter. Dip a 3” cutter into flour, cut one donut, then cut a hole in the center with the 1” cutter. Remove the donut to the floured baking sheet, and set the donut hole aside. Repeat this process until you’ve cut as many donuts as possible. Dust parchment paper on counter with flour, gently squeeze the donut holes and scraps together, place dough on floured parchment, and cover with other sheet of parchment. Very gently, roll out dough to 1/2” thickness. Repeat cutting and rolling process until you have 14 donuts and 5 or so donut holes (it's OK if you have a donut more or less and a donut hole more or less).
Fry the donuts: Once oil has reached 350 degrees, use a skimmer to gently slip one donut at a time into the pot, only adding as many donuts as you can without overcrowding the pan. Cook for 1 minute, then flip donuts over using skimmer. Cook for an additional 3 minutes, flipping gently two more times (total time of about 4 minutes for donuts, 3-1/2 minutes for donut holes). You'll know donuts are done when they are puffed, seem to have increased in size substantially, and are a deep reddish brown color. You may want to have a sacrificial donut or donut hole to check the inside for doneness. One at a time, remove the donuts with the skimmer and place on the paper towel-lined pan. Repeat frying in batches with the remaining donuts, allowing the oil to return to 350 degrees before adding more.
Dunk the donuts: After removing donuts from oil, allow them to cool just until they are no longer too hot to touch (just a few minutes). Immediately dunk in plain glaze, turning over to coat thoroughly; a spoon is helpful here to keep your fingers (relatively) mess free. Place on cooling rack and allow donuts to cool at least 20 minutes (the chocolate glaze may slide right off if the donuts are too warm). Once the whole batch of donuts are just slightly warm to the touch, dunk the top half of each donut in the chocolate glaze. Return to the cooling rack and top with sprinkles if desired. Allow chocolate glaze to set before eating, about 30 minutes. It will no longer be shiny, but won't smear. Yield: 14ish massive donuts and several donut holes.
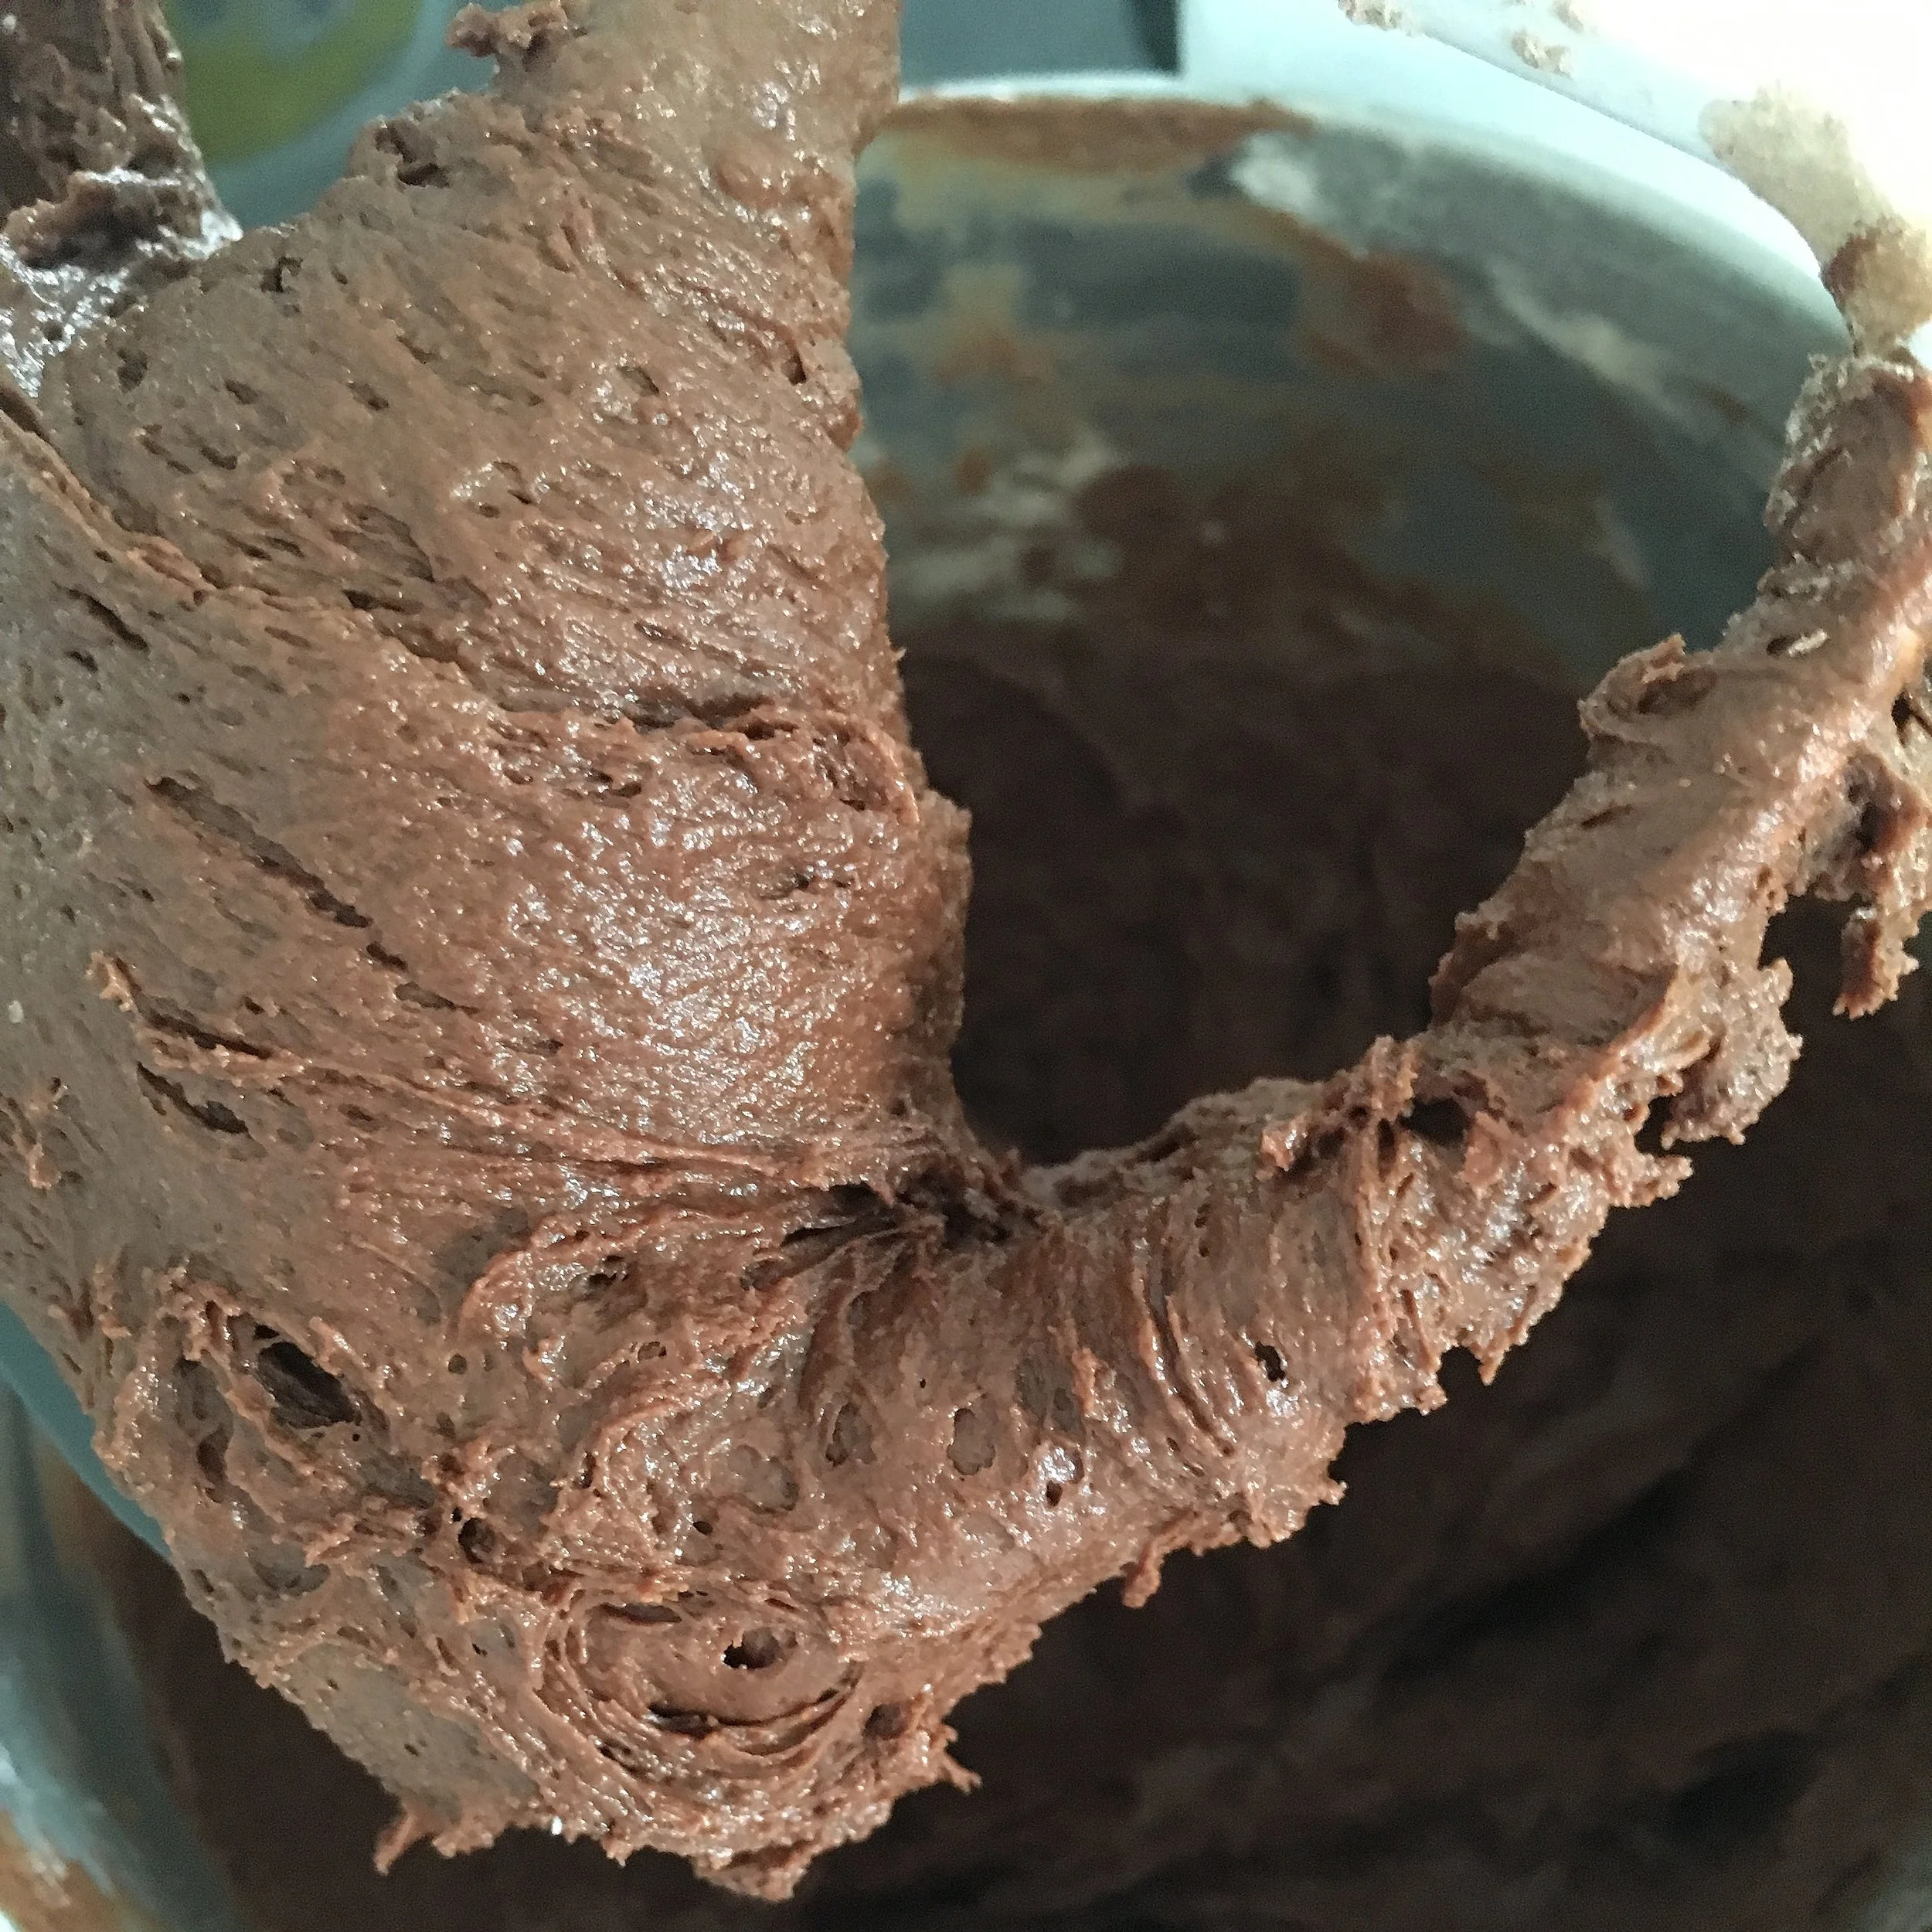
1. Fully mixed dough with be very thick and sticky. Don't try to handle it much without chilling it thoroughly first! Much weeping and gnashing of teeth will ensue otherwise.

2. Once the dough has been rolled between sheets of parchment and chilled, cutting can begin. The dough won't be super sticky, but dip your cutters in flour just in case. Again, weeping and gnashing are good to avoid.

3. Because these donuts are chocolate, it's hard to rely just on color as an indicator of doneness. They'll be a deep reddish brown AND quite puffy AND much bigger. Break into the first one out of the fryer if you need to to make sure they're not raw in the middle, then use that timing as a guide for the rest.
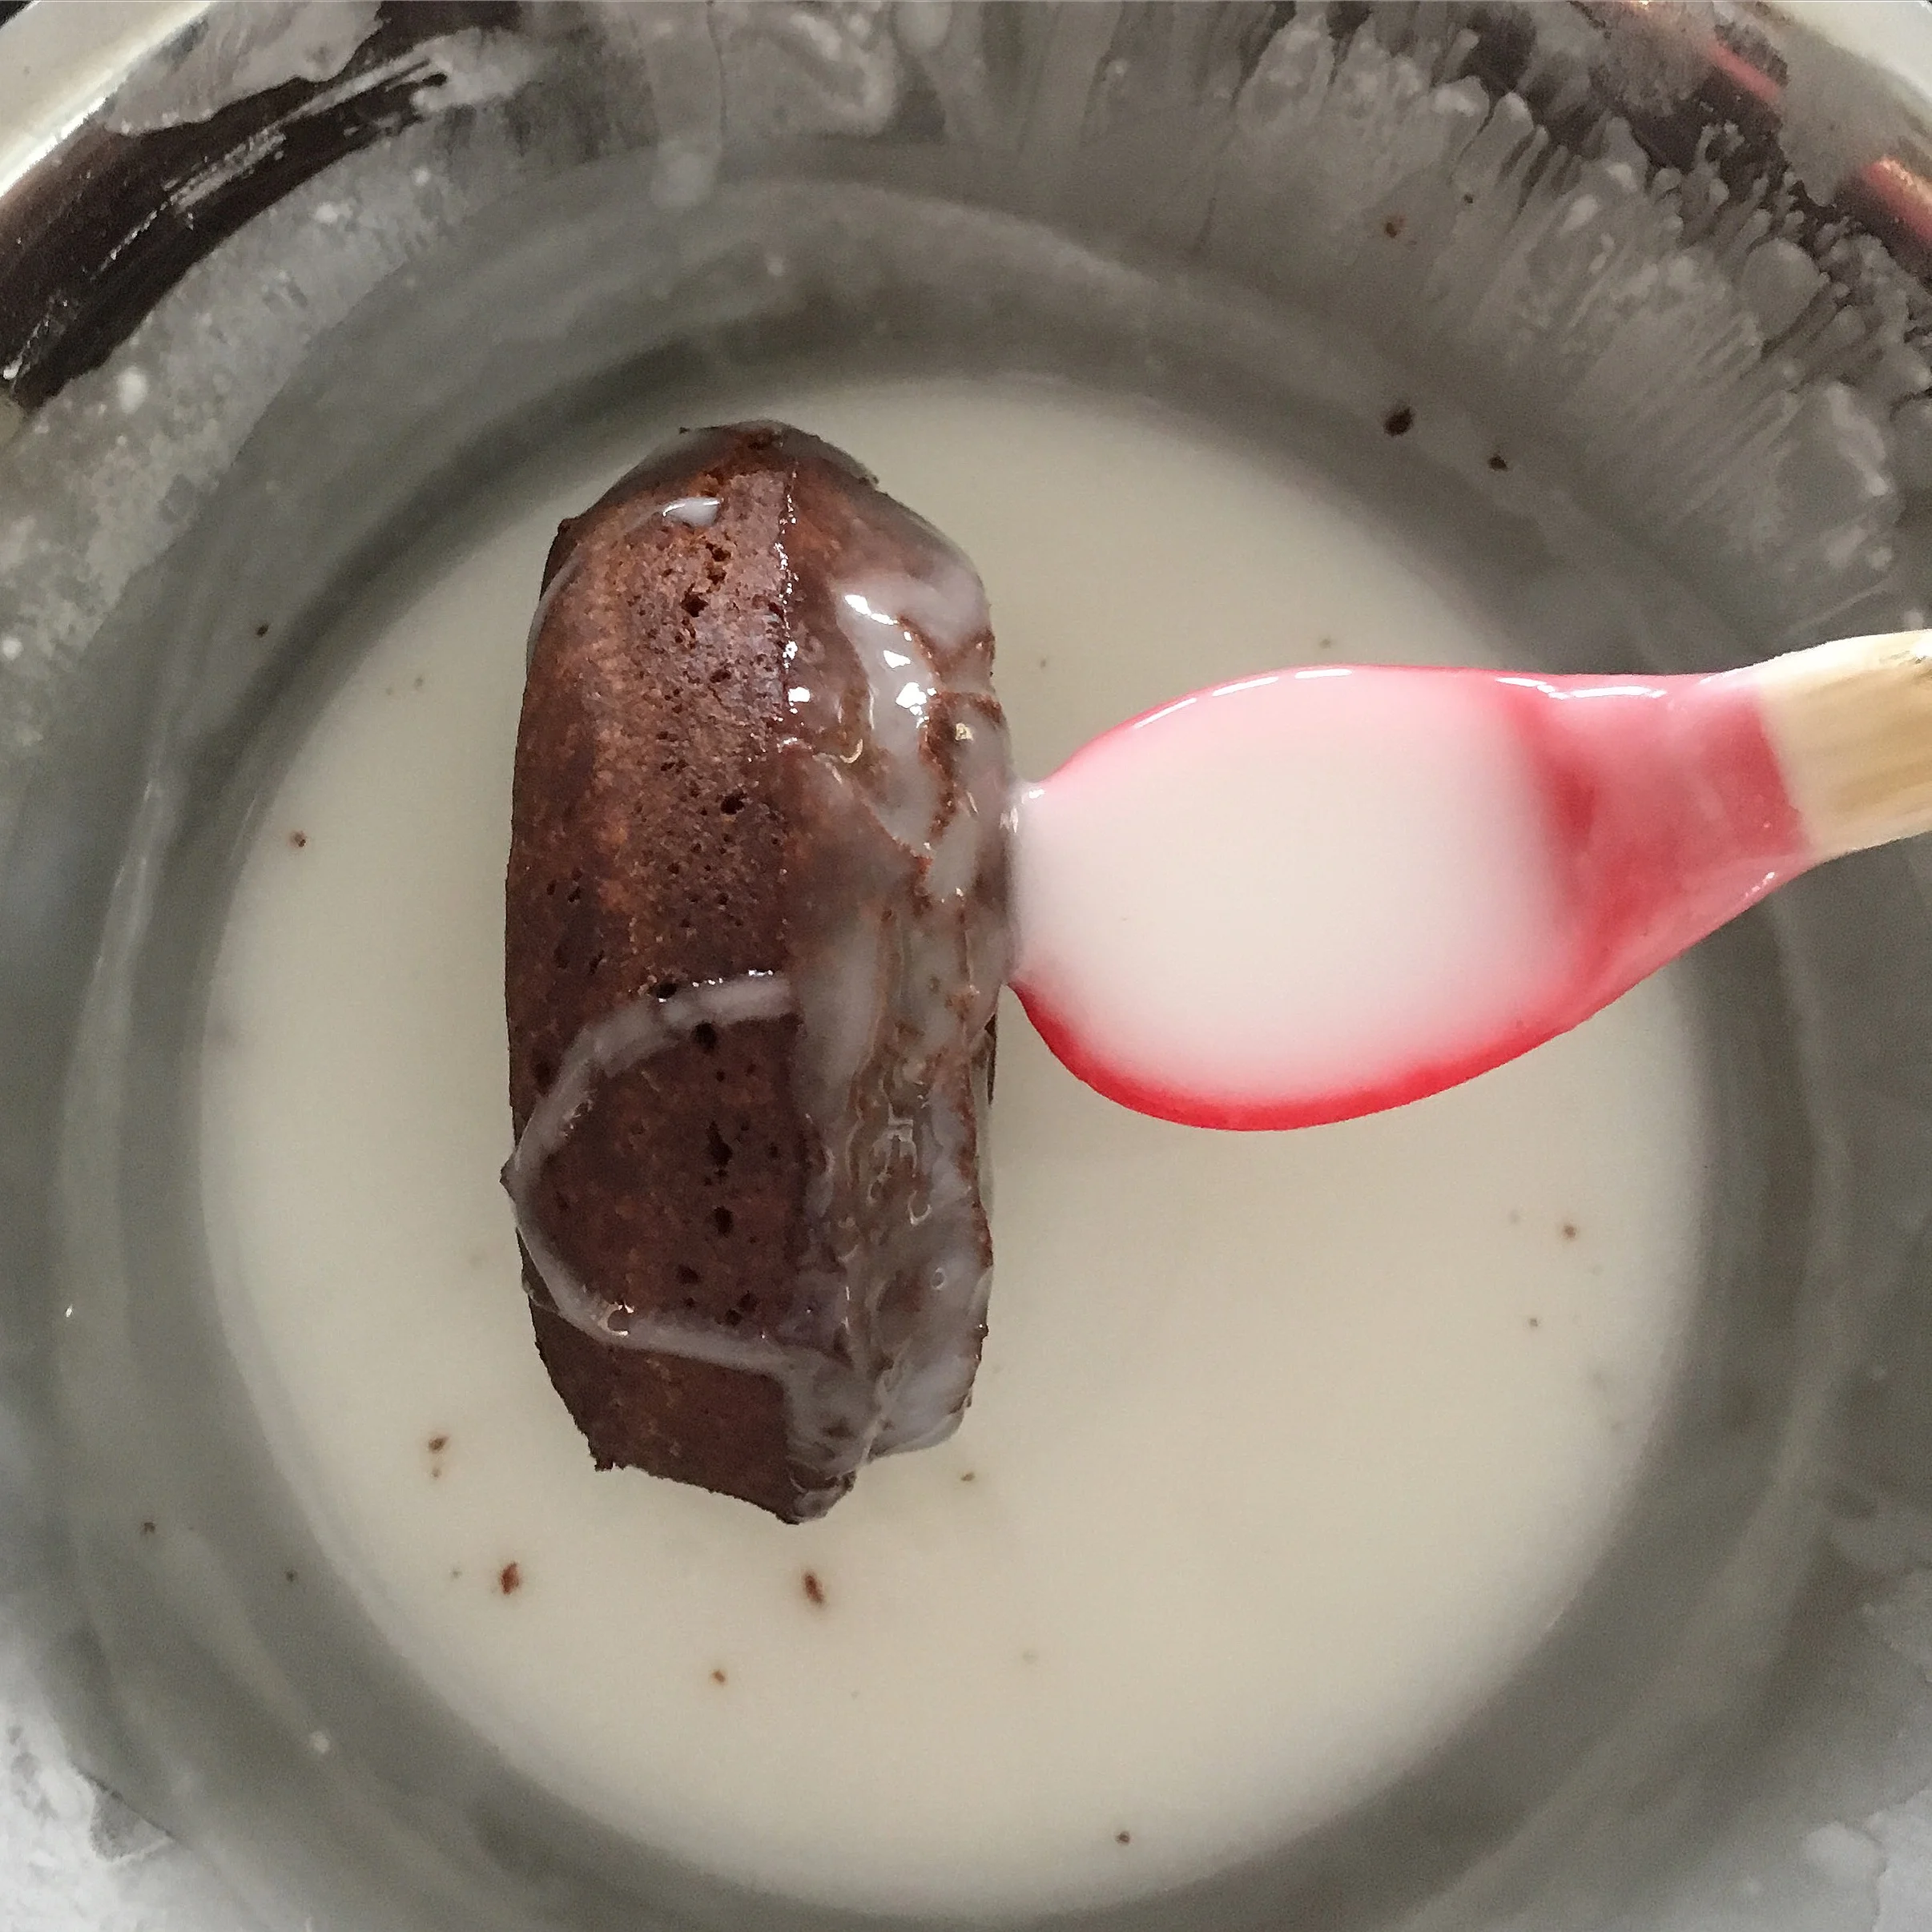
4. As each donut comes out of the fryer and cools just until you don't want to cry when touching it, dunk it right into the plain glaze. The whole thing. Both sides. This is the first dunk.

5. Dunk the entire batch of donuts and holes, then let them cool until glaze is set and they are just barely warm to the touch. Waiting is hard. You may want to eat some donut holes to tide you over.

6. Once the donuts have cooled for at least 20 minutes, it's time for the second dunk: chocolate glaze. We're going for the top half of the donut to be dripping with chocolate .

7. A final flourish of chocolate sprinkles right after the second dunk is optional but highly recommended. Because what is life without sprinkles? Let the glaze set until it's just barely smudged when you touch it (about 30 minutes) before eating. Or dive right in and have napkins on hand. Either way, marvel in the chocolate delight you have created. And then get on with your life.